How to Change Virtual Memory Size in Windows 11 or 10
The paging file or virtual memory is a fixed block of space on your hard disk or SSD drive that Windows allocates to act as RAM in case your system runs out of RAM. This block is stored in Windows 11 or 10 as a hidden file named “pagefile.sys”. Windows manages the size of this pagefile automatically. Still, you can change the virtual memory size in Windows 11 or 10 to ensure your system doesn’t throw the “Your system is low on virtual memory” error.
Another vital use of the paging file or virtual memory is for creating the crash dump in the case of BSOD. The larger the pagefile size, the more information the crash dump will have. Sometimes, when your system is low on virtual memory, essential services might crash causing your computer to hang or disrupt user profile service.
How to Change Pagefile (Virtual Memory) Size in Windows 11 or 10
Changing the pagefile size in Windows is relatively easy. You need to go to the Advanced System Properties and set the custom size for pagefile or virtual memory for your Windows 11 or 10. Just follow these steps:
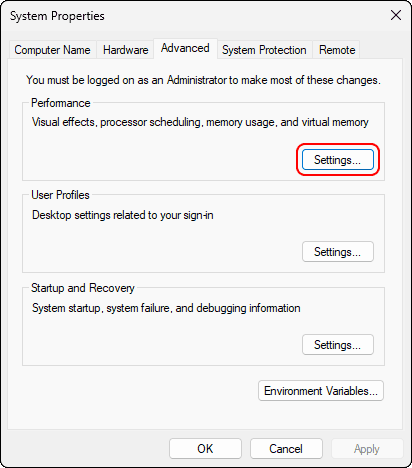
Step 1: Open Advanced System Properties
First of all, launch the RUN utility (press Windows + R). Then type systempropertiesadvanced , and press Enter or click OK.
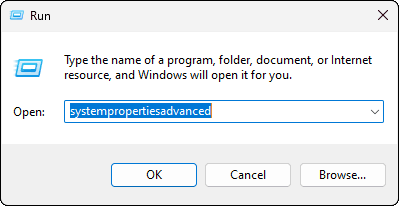
systempropertiesadvanced , and press EnterThis will launch the System Properties window on your Windows 10 or Windows 11 and open the Advanced tab. The Advanced System Properties will allow us to modify the size of pagefile or virtual memory for Windows.
Step 2: Go to Virtual Memory Settings
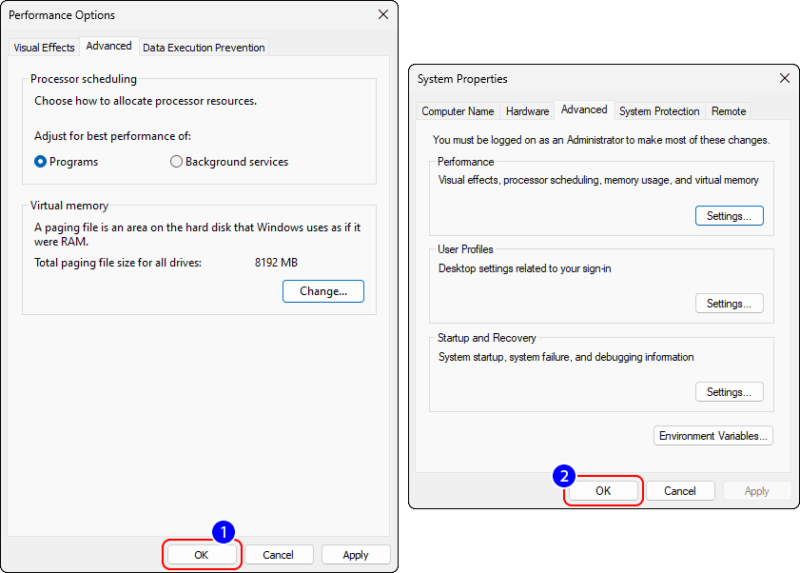
In the Advanced System Properties window click Settings under the Performance section.
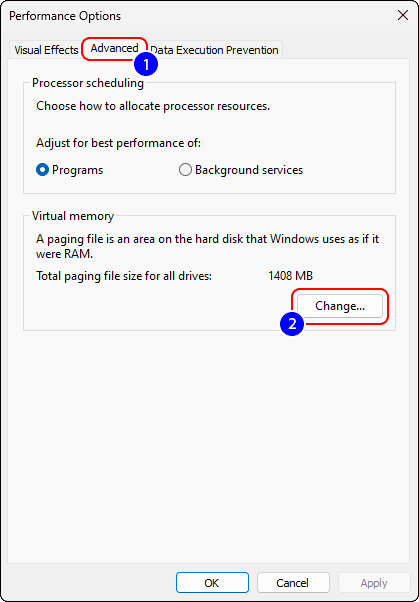
This will open the Performance Options window for your Windows 11 or 10. Now, go to the Advanced tab and click Change under Virtual Memory to change the size of the pagefile for your Windows 11 or 10.
Step 3: Change the Virtual Memory (Page File) Size for Windows 11 or 10
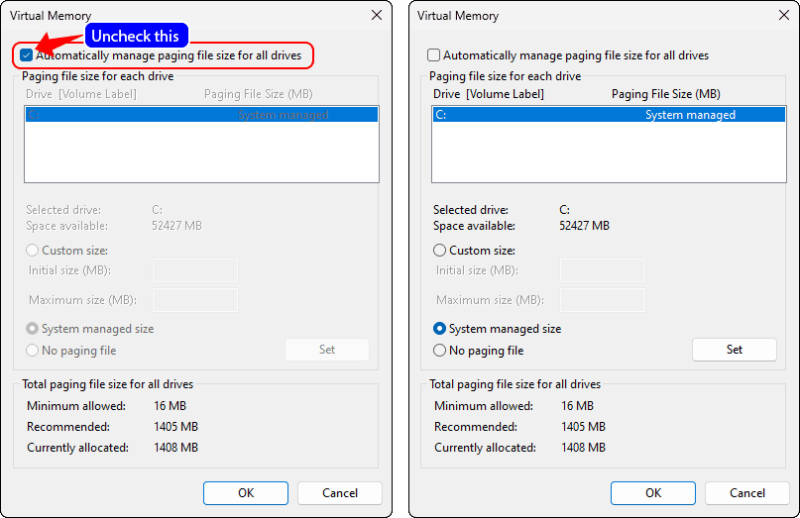
Now, you will see the Virtual Memory window. By default, Windows manages the size of pagefile for each drive automatically. However, sometimes, you might need to change the size of the virtual memory or the page file to suit your needs.
To do this, first, uncheck the box next to “Automatically manage paging file size for all drives”. This will allow you to modify the virtual memory settings in your Windows 10 or 11.
Now, you can set the custom size for the paging file or virtual memory as per your requirements. Usually, the pagefile size ranges between 1.5 to 4 times of physical RAM installed in your PC. However, you can set the size as per your requirements.
So first, select the Windows drive (C in most cases) to change the virtual memory size. Next, select Custom size: and enter the value of virtual memory in MB in the Initial size and Maximum size fields. After that, click Set and OK to continue.
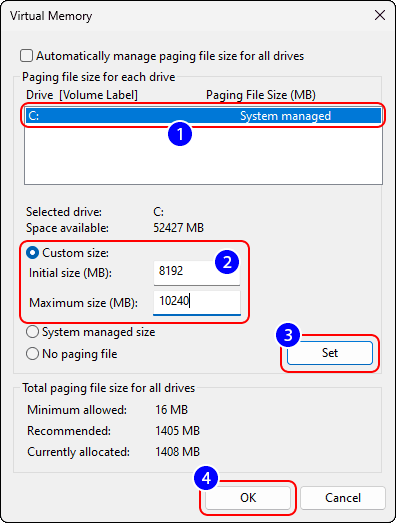
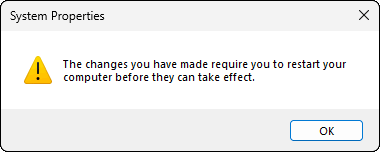
You may see a warning for requiring a reboot after changing the paging file size in Windows, simply click OK.
Step 4: Close the System Properties window and Restart your PC
Now that you have set the value to virtual memory as per your requirements, simply click OK on the Performance Options and Advanced System Properties windows to close them.
Finally, you will see a prompt to restart your computer to apply the new virtual memory or paging file size to your Windows 10 or 11. Click Restart Now to restart your computer and apply the changes.

SEE ALSO: How to Run Windows 11 on Virtual Machine via VirtualBox?
Change the Paging File (pagefile.sys) Size in Your Windows 11 or 10 to Boost the Performance
The paging file or virtual memory might give your system a performance boost. While there are several other ways to make your Windows 11 or 10 faster, virtual memory can also make your system fast. You can read more about the paging file here.
In case you are having trouble following this tutorial, you can drop a comment down below. You may also subscribe to our newsletter to get the latest posts by email.